- Demotion Shield Expiring Guide - April 29, 2022
- Valoran Guide - April 22, 2022
- Arcane Comet Guide - April 19, 2022
Summoner’s Rift is the most famous battle arena map in MOBA history because it contains plenty of objectives for players to fight over in a competitive setting. Currently, League of Legends features 2 playable maps – Summoner’s Rift and the Howling Abyss. In addition, they provide unique game modes that deliver vastly different gaming experiences.
Moreover, every few months, the developers of League release a new game mode available for a limited time. For example, the most popular is URF, which is played on Summoner‘s Rift. However, some game modes come with a completely new map with unique objectives and monsters.
Therefore, knowing each map’s layout and key details can help provide significant advantages that could lead to more victories. We’ll cover everything you need to know, from different types of maps to objective locations.
Bottom Line Up Front
Here’s a TLDR about League of Legends maps if you’re in a hurry. Summoner’s Rift is the main map in League of Legends that contains three lanes – mid, top, and bottom. You are assigned a specific lane to farm and gain experience depending on your champion. Also, the fifth role is the jungler, who roams between lanes helping teammates get ahead.
League of Legends features multiple maps for specific game modes. For example, ARAM (All Random All Mid) is located on the Howling Abyss, a narrow lane. Matches usually last up to 30 minutes as the games have constant fighting and increased gold per second.
Furthermore, the game has limited time maps, such as Nexus Blitz and Dominion. The Nexus Blitz game mode contains many events like Prize Fights, Bardle Royal, URF Deathmatch, and more. Games never go over 20 minutes, as the Sudden Death event will begin at minute 18. This is where both Nexus stand up and head to the middle for one last epic fight.
Continue reading if you’d like to learn more about League of Legends’ maps. We’ll discuss unique features, map design, and key objectives.
How Many Maps Does League of Legends Offer?
Currently, there are two main maps in League of Legends – Summoner’s Rift and the Howling Abyss. The most famous is Summoner’s Rift, where 5 players on each team go head-to-head to destroy each other’s Nexus. It features three lanes and multiple jungle camps, making the map diverse and intriguing to play.
On the other hand, the Howling Abyss is a chaotic single lane 5v5 battle ideal for those who want faster-paced games. However, League of Legends features multiple maps tailor-made for specific game modes or events. Let’s discuss each map individually and inspect its most remarkable features.
Summoner’s Rift
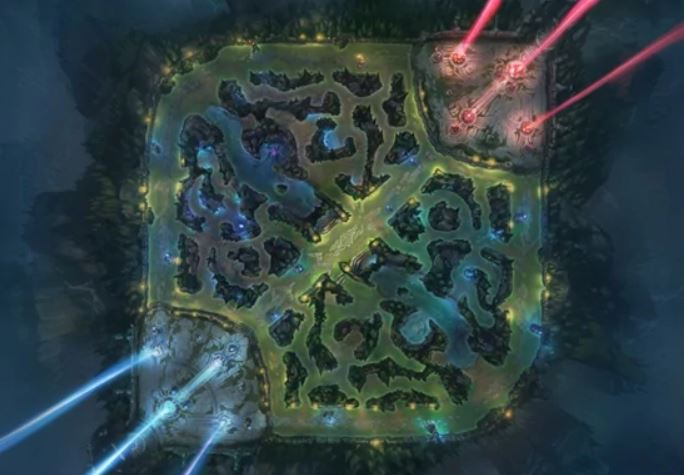
Summoner’s Rift is the main map in League of Legends. It has three lanes – top, mid, and bot. These are the lanes that champions duel and farm minions to earn experience. The map was first introduced in 2009 and took the MOBA scene by storm, gaining a massive player base. On November 12th, 2014, an updated Summoner’s Rift was introduced, featuring beautiful aesthetics and a welcoming player experience. Let’s discuss this marvel of a map in more detail.
Lanes
The map contains three lanes positioned at the top, in the middle, and at the bottom. Depending on your champion, you are assigned a specific lane that fits the meta.
Top Lane
Top lane runs start at the map’s northeast corner and runs along the top boundary until it meets the northwest corner. It’s the most isolated lane since the closest objective is Rift Herald or Baron, which are mid to late-game objectives. Therefore, teams tend to focus on the mid and bottom lane, leaving top to fend for themselves.
Champions residing in the top lane are often tanky or bruiser champions since they prefer to farm than fight. This lets them get fed off minions and purchase core items to be ready for team fights.
Middle Lane
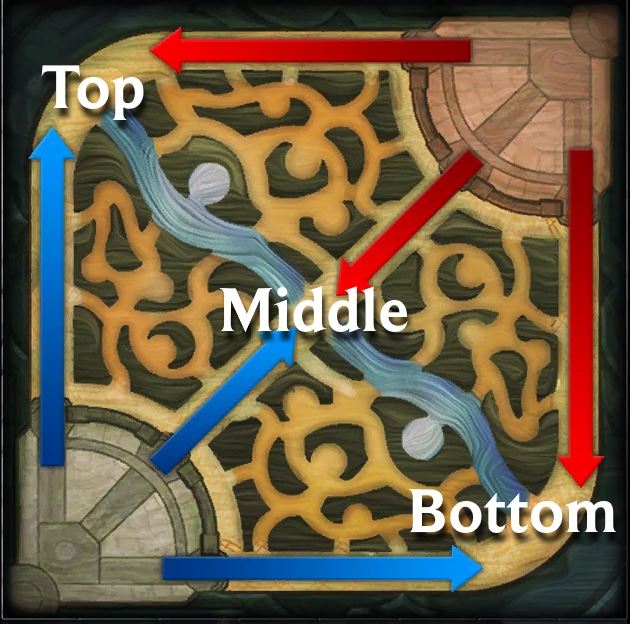
Mid-lane is the creator of the ARAM (All Random All Middle) game mode. Before, players would go mid in a permanent 5v5 situation until RIOT Games eventually dedicated time to create the game mode we know and love today.
This lane is based in the middle of the map and is the shortest in length. Most often, assassins and mages go mid because they can get to safety quickly under their tower. Perhaps, control mages and best for this lane as they have strong wave clear and can deny enemies minions by keeping them under the tower.
Also, champions in mid have excellent roaming potential since Drake and bot lane are close by. This lets them quickly help out teammates in need and secure important objectives without hurting their laneing phase.
The mid lane is flanked on both sides by the river, which leaves junglers ganking opportunities as it’s difficult to have vision on both sides permanently. Therefore, the most optimal strategy is to ward off one side and stay within reach of your vision.
Bottom Lane
Finally, we have the bot lane that runs along the bottom half of the map. This lane is special because of its proximity to the dragon, which is easy to secure early game to receive powerful buffs. Therefore, the ADC and support go in this lane to provide the best odds of securing objectives.
ADCs are ultra-weak by themselves and require aid for them to farm safely. Therefore, it’s the support’s job to provide utility spells and use their bodies as shields for the ADC. Also, the support typically leaves the lane at some point to roam around the map and place wards.
Turrets
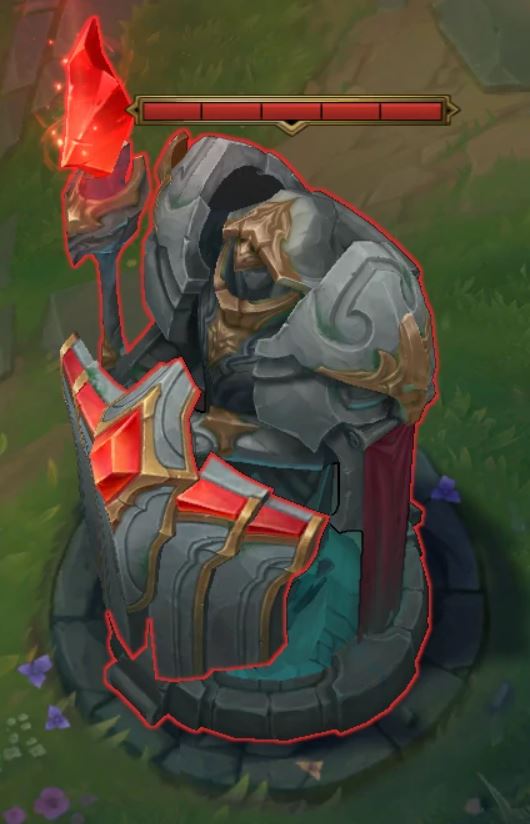
There are 22 towers on Summoner’s Rift, 11 per team. Each team has 3 lane turrets and 2 more towers protecting the Nexus. These structures are the most important in League of Legends because destroying them provides more map spaces and leads you closer to the inhibitor.
Although all 22 turrets may look similar, they can be categorized into 4 classes:
Outer Turret (Tier 1)
This tower is the furthest from the Nexus and is often a target in the early game. Also, it’s perhaps the most unique structure due to a few distinct mechanics that differentiate it from other turrets.
- Turret Plating: Outer turrets have large stone shields that hover in front of it called plates. All towers receive 5 plates that resemble a specific percentage of the structure’s health. Destroying them grants you and your allies gold. However, the turret gains significantly more resistance the more plates you takedown. Also, turret plating lasts for 14 minutes and breaks off afterward.
- Fortification: All tier 1 towers receive the Fortification buff for 5 minutes. This attribute reduces damage from all sources by 50%, making turrets last longer in the early game.
Inner Turret (Tier 2)
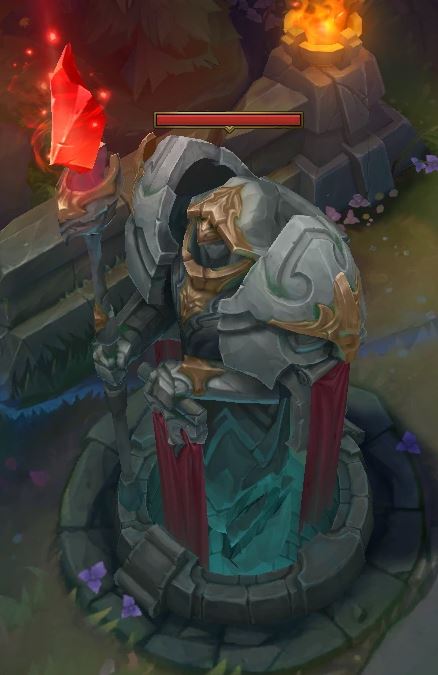
Inner towers have more resistances than outer turrets, making them last longer during the mid-game. The tower sits in front of the inhibitor tower and is the last stand before the enemy can attempt to destroy your base. This structure has no unique buffs or mechanics that can provide a defensive edge. Therefore, grouped enemies can easily focus down the tower and gain more map control.
Inhibitor Turret (Tier 3)
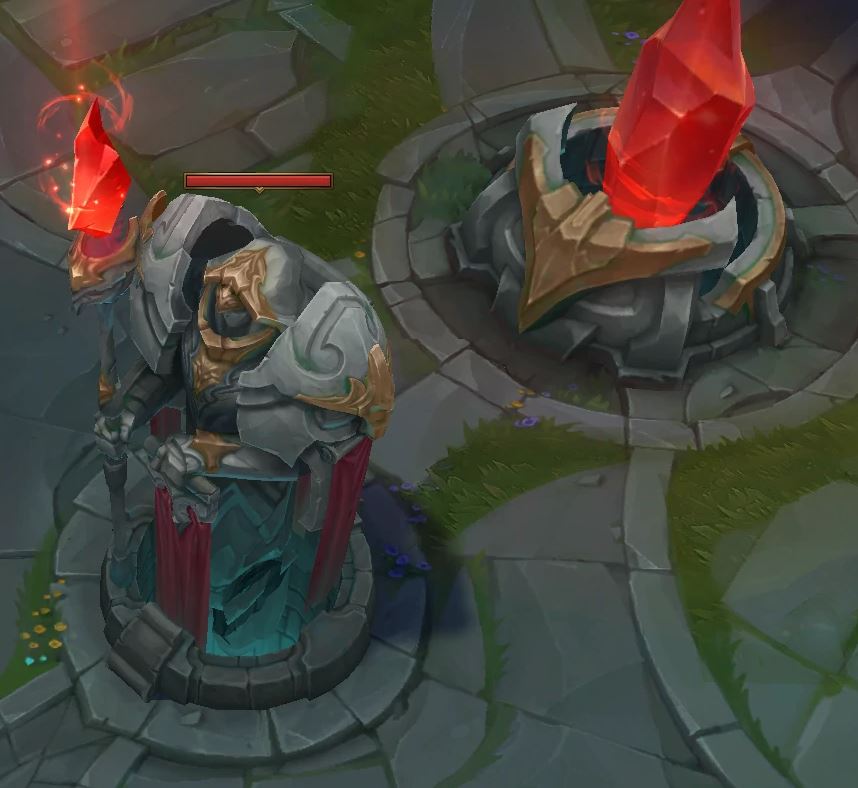
Inhibitor towers are the final barriers to entering a team’s base. Its purpose is to protect the inhibitor, which spawns super minions for the opposing team. Unlike other structures, the inhibitor turret can regenerate its health back.
- Regeneration: Inhibitor turrets regenerate 3 health per second up to a specific amount depending on their missing HP.
- Below 33.3%, regen upto 33.3% health.
- Above 33.3% and below 66.7%, regen up to 66.7% health.
- Above 66.7% and below 100%, regen up to 100% health.
Nexus Turret (Tier 4)
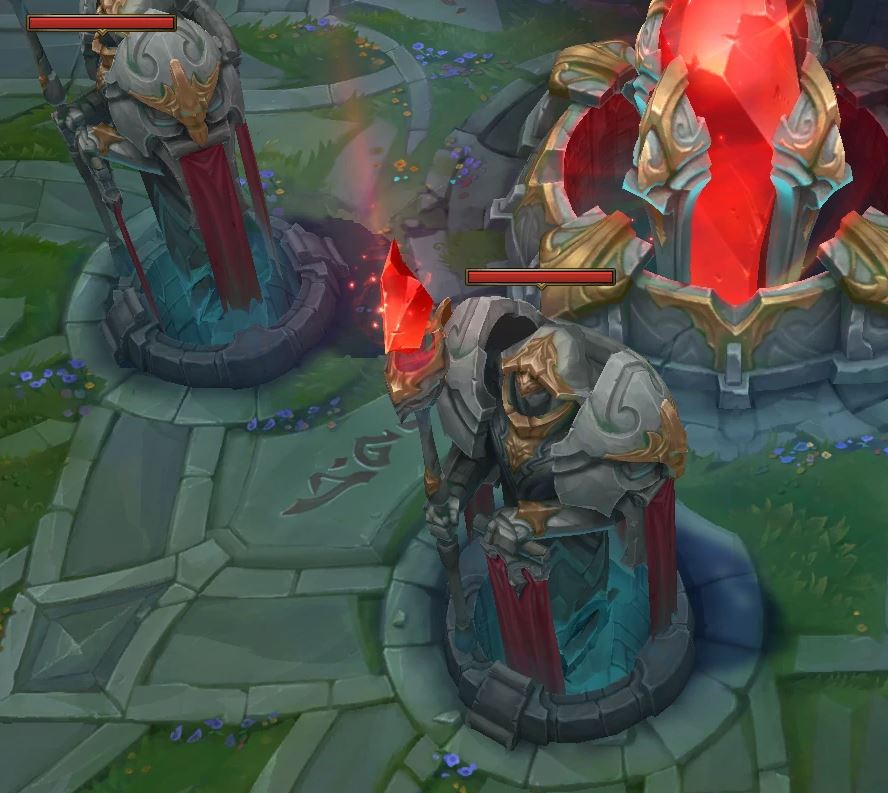
The Nexus turrets are the most important towers as they protect the heart of a base. Each team has 2 towers guarding the Nexus, making it difficult for opponents to breach the structure. Moreover, they share the same regenerative features as inhibitor turrets.
- Regeneration: Inhibitor turrets regenerate 6 health per second up to a specific amount depending on their missing HP.
- Below 33.3%, regen upto 33.3% health.
- Above 33.3% and below 66.7%, regen up to 66.7% health.
- Above 66.7% and below 100%, regen up to 100% health.
Tower Attributes
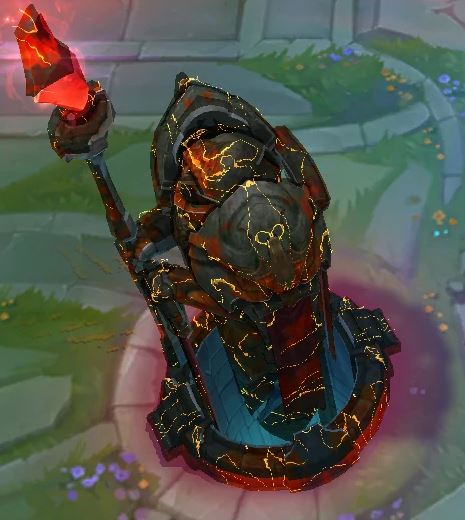
Turrets have several distinct features that make them unbelievably powerful against champions. Often many fail tower diving as they fail to calculate the damage output of the tower. Let’s go over the key attributes all towers have.
Ohmwrecker:
-
- +30% armor penetration
- Tower projectiles cannot be parried, intercepted, or evaded.
- Tower damage increases by 40% each time they hit a champion.
- Reinforced Armor: Reduces incoming damage by 66.6% and is immune to true damage when no minions are nearby.
- Warden’s Eye: This passive grants true sight, giving vision of stealth enemies and traps.
Jungle
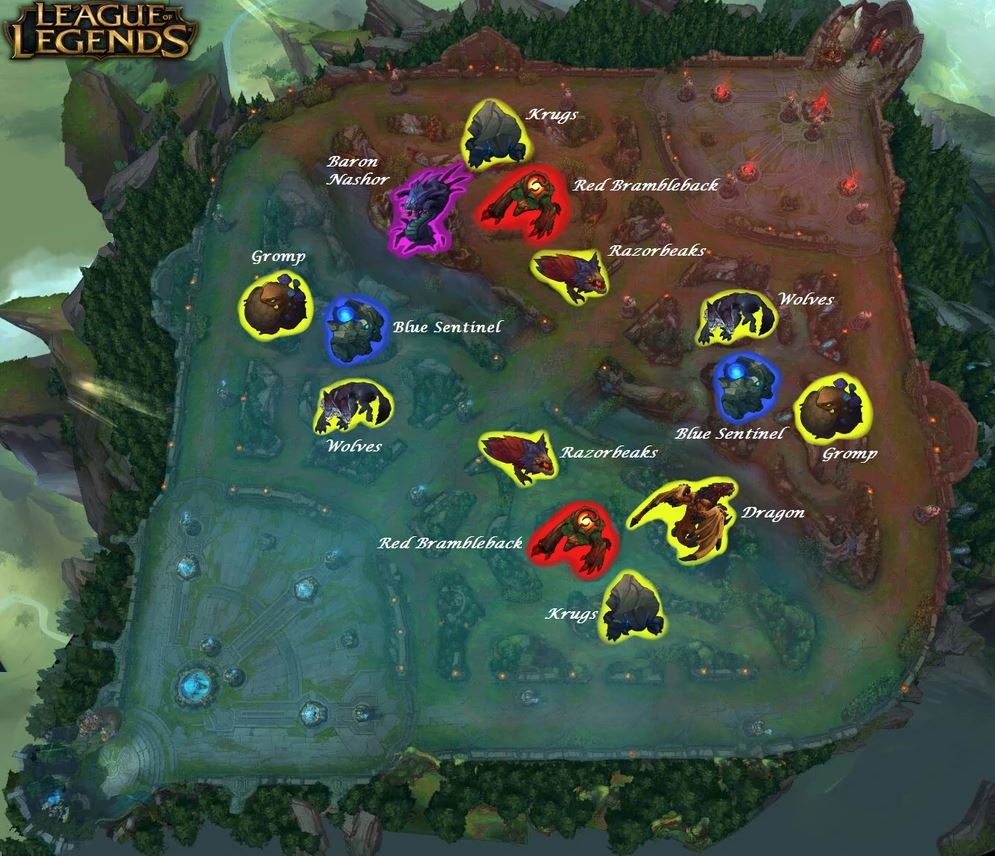
The jungle is a unique part of the map in Summoner’s Rift that is located between lanes. Here you can find various monsters to slay for gold and buffs. In addition, this part of the map features a unique role called the jungler, who roams around the map freely, helping other lanes get ahead. Beyond this, the jungle monsters are much different from the countless waves of minions that laners face.
- Red Brambleback: More commonly known as Red Buff, this large jungle creature is one of two options the jungler kills at the start of each match. The monster provides the “Crest of Cinders” buff, offering health regeneration and a burning attack.
- Blue Sentinel: Much like Red Brambleback, the jungler will opt for slaying Blue Sentinel at the start of the game. It resides near the baron pit or in front of the dragon’s lair. The Blue Sentinel gives the “Crest of Insight” buff, providing increased mana restoration and cooldown reduction.
- Rift Scuttler: The Rift Scuttler is perhaps the most unique and contested jungle camp due to the income it provides. The creature wanders in the river on both sides of the map. Using any crowd control spell or item will eliminate its shield and allow champions to deal significant damage.
- Gromp: Gromp is a large toad-like creature that is located next to the Blue Sentinel. The most important thing to note about Gromp is that it deals magic damage with its auto-attacks.
- Greater Murk Wolf and Murk Wolves: This camp is also near the Blue Sentinel and features a large wolf with two smaller ones. They are relatively easy to kill, but it’s recommended to kill the Murk Wolves first since they have less health.
- Crimson Raptor and Raptors: The camp is on the right side of the mid lane and features several small raptors with a large bird at the back. The best method of slaying them is to kill the small raptors first since they deal significant damage when in a swarm. Afterward, you can kill the Crimson Raptor with a few spells and auto-attacks.
- Ancient Krugs: These old-timers are often forgotten as they sit on the far side of bot or top lane. After killing the first Krug, they will divide into two smaller versions until they reach their mini version. They take the longest to kill due to the separating animation that makes them untargetable for a short duration.
Plants
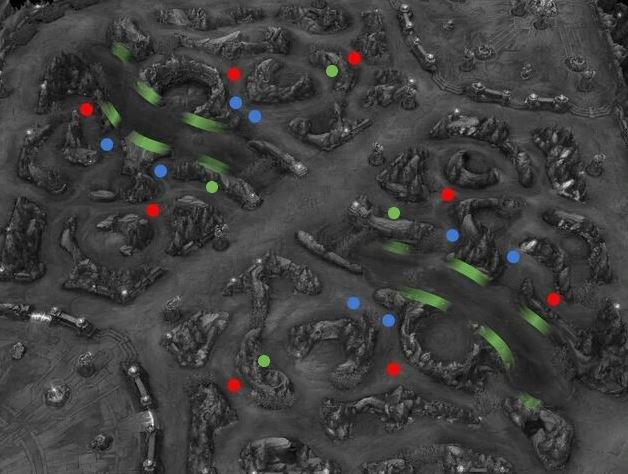
Besides flowers, bushes, and trees that you can admire in Summoner’s Rift, you can interact with some notable plants. Each plant offers a different purpose to help players gain an edge over the opponent.
- Blast Cone: There are 4 blast cones in the Rift, all located in the jungle near walls. The purpose of these plants is to create distance or close the gap between you and the opponent. You can jump over walls and effectively avoid being killed with these plants.
- Brush: These bushes are located all around the map to conceal champions. This makes them an excellent tool for creating a surprise attack and killing opponents. Upon entering a brush, your champion will look slightly transparent, indicating they are hidden. However, wards can provide vision of the bush and the surrounding area.
- Honey Fruit: The Honey Fruit plant can be found in the river and heal your character a small amount. Hitting the plant will make it explode into 4 smaller pieces that slow, heal, and regen mana when eaten.
- Scryer’s Bloom: These aesthetically pleasing plants can be found near the river and give vision when hit. The plant will display the range and angle of where it will grant vision, so you can easily adjust your champion’s position to obtain the best reach.
Summoner’s Rift Objectives You Should Focus On
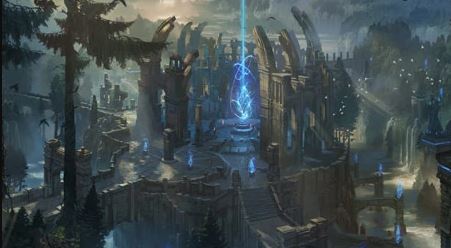
The Summoner’s Rift map features several noteworthy objectives worth focusing on to win the game. Let’s discuss each one in greater detail.
- Turrets: Towers are essential to focus to barrel down the enemy team’s lane and destroy their nexus. Destroying turrets provides numerous benefits like gaining more map space, demoralizing opponents, and acquiring extra vision.
- Nexus: The most important structure in League of Legends is the Nexus. It’s the heart of every team’s base and is the main objective to destroy. Killing the structure will end the game and claim victory for your team. It has 5,000 health and regenerates slowly over time.
- Inhibitor: The Rift features 3 inhibitors located behind their dedicated tier 3 tower. Destroying it allows your Nexus to spawn super minions, replacing your cannon minion. It provides a significant advantage when destroyed because lanes are automatically pushed towards the enemy without the need for a champion’s intervention.
- Baron: Baron Nashor is an end game buff that significantly boosts your stats, minions, and grants 300 gold. It resides below top lane in the river and spawns after 20 minutes of in-game time. Killing it is a challenge, so you’ll need to gather your team for the best odds.
- Rift Herald: This monster spawns after 8 minutes in Baron Nashor’s lair and stays there until minute 20. Killing the creature grants the Eye of the Herald buff and an empowered recall. The Eye of the Herald spawns the creature anywhere on the map and deals massive damage to towers.
- Dragon: Drake is an early game objective located in bot lane river. Each dragon is unique and provides various buffs to your team. If your team secures 4 dragons, you’ll receive a soul that significantly improves the existing buffs. Also, the dragon spawns quite often as it has a 5-minute timer.
- Elder Dragon: The Elder Dragon spawns 6 minutes after acquiring a dragon’s soul. It has much more health than other Drakes and provides Aspect of the Dragon buff. This provides an ignite type effect on all auto-attacks and automatically executes enemies below 20% health.
- Blue and Red Buff: The Red Brambleback and Blue Sentinel are amazing buffs that can help provide the extra damage or cooldown needed to complete a takedown. Moreover, taking the enemy red or blue puts them at a disadvantage since your team will gain 2 extra buffs.
The Howling Abyss
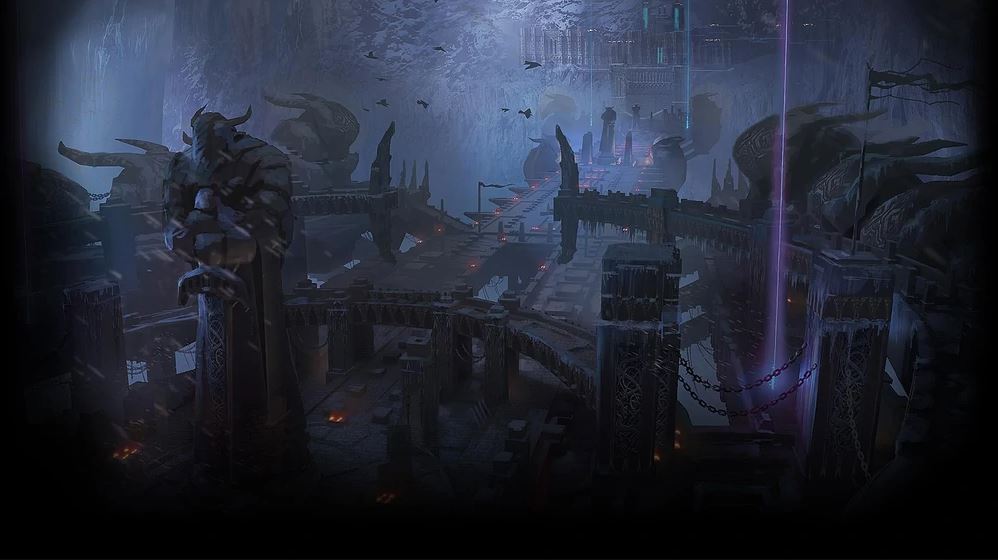
The Howling Abyss is the map where the ARAM (All Random All Mid) game mode takes place. This is a single-lane environment where 10 players go toe to toe in a 5v5 matchup. The randomization of your champions is one of the fundamental differences between this game mode and normals on Summoner’s Rift. Players can only receive a champion they own or those in the free rotation.
However, if you are unhappy with your champion, you can reroll to bench your previous character. The champion in question will then be available to your teammates as long as they own it or it’s in the free rotation.
The goal of The Howling Abyss is to push down the enemy’s base and destroy the Nexus. Naturally, this results in multiple team fights as players defend their towers and objectives. As a result, games are sped up and last around 15 to 30 minutes.
The map design is unique since it features a single lane with 4 towers per team. The two outer turrets defend the inhibitor, unlike on Summoner’s Rift where there is a 3rd tower. Afterward, you’ll find two more towers guarding the Nexus.
The Howling Abyss Items
ARAM matches begin with players buying their starting items, similar to other game modes. But there are mode-specific items that can only be used in the Howling Abyss. These items can provide a combination of AP, AD, regen, or lifesteal. Also, they count as legendary items, making them perfect until the late game. Afterward, you can sell them at a reasonable price to complete another item.
The Howling Abyss Mechanics
When playing ARAM, leaving your base means you won’t regen health or mana and can’t buy items until death. This adds a layer of strategy because you need to time your deaths well to buy items and come back stronger. After acquiring a good amount of gold, your strategy should shift to fighting recklessly or even suicide to a turret. Gold sitting in your inventory is no benefit so use your advantage and buy core items.
Nexus Blitz
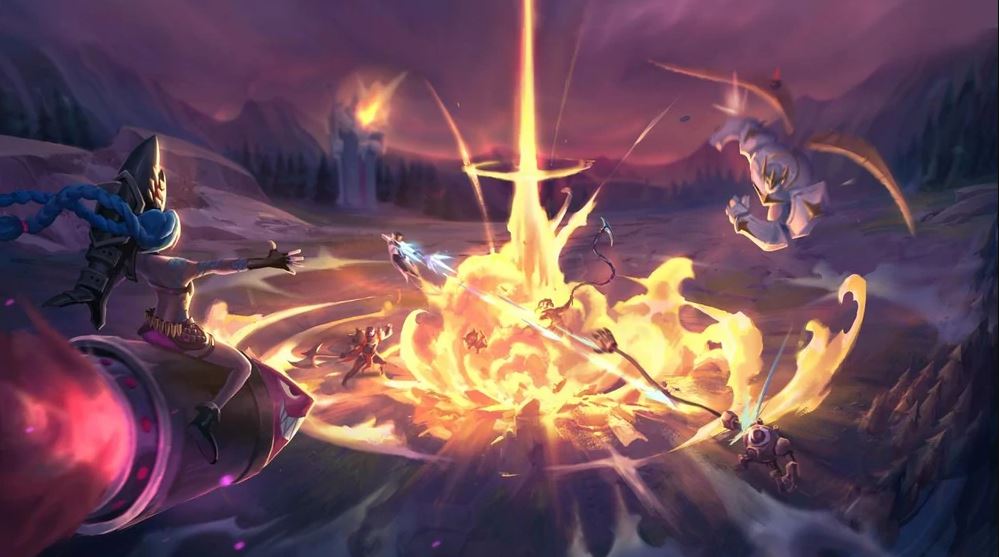
The Nexus Blitz map features an iconic game mode introduced in 2018. In 2020, the mode was brought back with a revamped map and new visuals. Nexus Blitz has a bottom lane, middle lane, and a jungle at the top. At the back of each team, we can find the Nexus with a single outer turret that protects it.
Originally, the map was intended to replace the Twisted Treeline, a 3v3 game mode. However, the map didn’t receive a viable player base, so RIOT made Nexus Blitz a limited-time mode game.
Nexus Blitz is a tremendously fun map where matches tend to last around 20 minutes. In those 20 minutes, teams must try to destroy the opposing Nexus while completing specific tasks. Each game has unique events that offer an immersive experience and a fun time.
Nexus Blitz Events
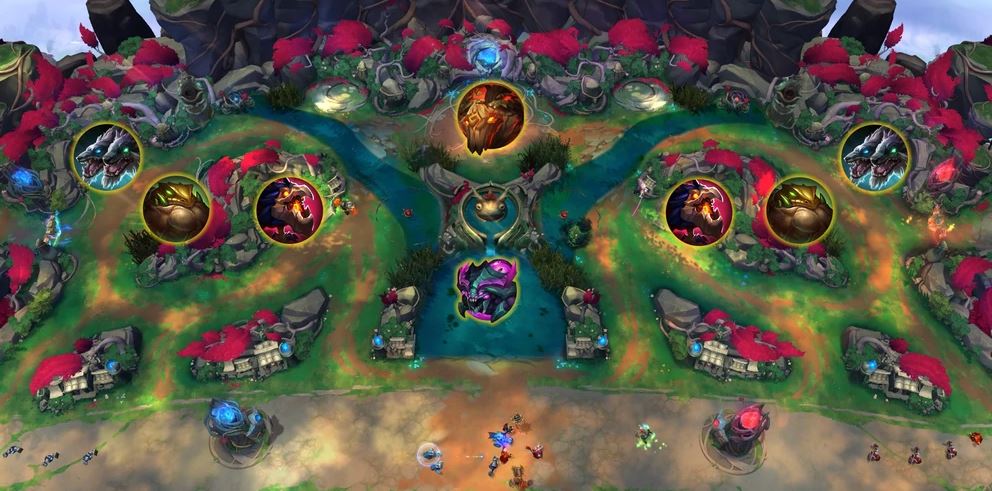
- Bardle Royale: A firewall encircles a part of the map that slowly closes in on itself. Players must fight until the final champion is left standing. Going outside of the bounty results in constant true damage.
- Bardle Royale – Juggernaut: This is the same event as Bardle Royal. However, one random champion in each team gains a significant amount of health and the On Fire buff at the start.
- Bardle Royal – Paranoia: This is the same event as Bardle Royale, but all players have their sight greatly reduced. The effect is similar to Nocturne’s ultimate, which increases the fog of war area.
- URF Deathmatch: Everyone gains the Awesome Buff of Awesomely Awesome Buffing, which reduces cooldowns significantly. Then teams will fight three rounds in a 5v5 battle.
- Loot Goblin: Either a large Teemo or Veigar will spawn with a tremendous amount of health. These characters will roam around the map and use their abilities to make it harder for each team to slay them. Upon killing the Yordle, your team gains a significant amount of gold.
- Push the Cart: A cart will spawn in the middle of the map that can be pushed by entering its radius. Pushing it to the nearest tower will make it explode and deal a huge chunk of damage.
- Prize Fight: Three rounds of fights will occur: 2v2, 2v2, and 1v1. Matchups are balanced based on gold earned.
- King of the Hill: A control point appears at a random point on the map. Standing in the uncontested area will generate the team’s capture process. After gaining 100% your team claims the victory.
- Scuttle Racing: Two Rift Scuttlers appear at a start line in the middle of the map. Players must use crowd control abilities to slow the opponent’s Rift Scuttler while protecting their Rift Scuttler.
- Protect the Soraka: Two beginner Soraka bots will appear in the mid lane and assist the team. The aim of this game is to kill the opposing Soraka and stop her from healing teammates.
- DPS Check: A practice dummy will spawn either in the middle of the map or to the side of the behind team. The event lasts 75 seconds, and players must do as much damage to the dummy during that time.
- Sudden Death: This final event occurs at 18 minutes. Each team is recalled back to base as their Nexus will start walking towards the middle of the map. Catapult of Champions is granted to both teams, and death timers are set to 15 seconds. The team that destroys the opponent’s Nexus claims victory.
Nexus Blitz Event Rewards
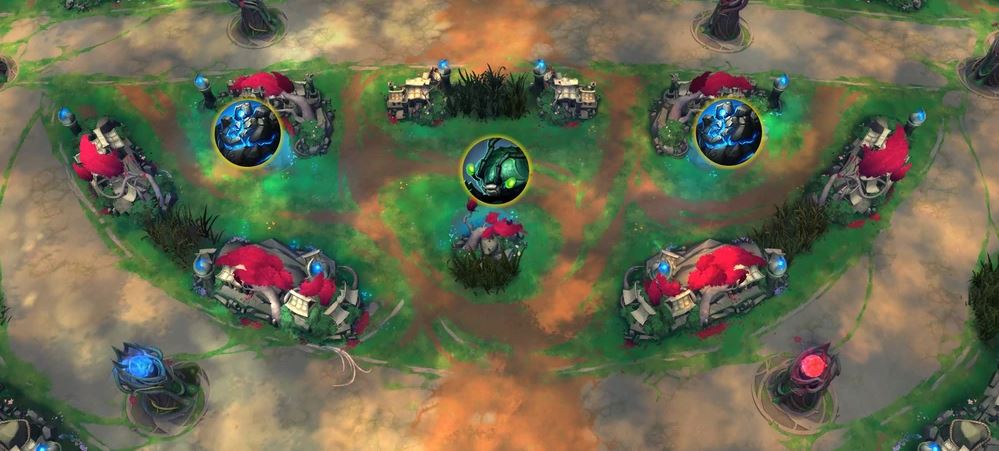
- Catapult of Champions: Your team may receive the Catapult of Champions buff after winning an event. This places a cannon near your base, like in URF, that launches you across the map.
- Blessing of Blitzcrank: Gives your turret and cannon minions the ability to use Blitzcrank’s rocket grab. This pulls the enemy closer to you, letting you attack them quickly.
- Poro King: The Poro King arrives to aid your team, pushing through the middle lane. It helps siege enemy towers, breaths fire on enemies, and periodically heals nearby teammates.
- Battle Sled: The whole team can pile into the battle sled to cruise around the map until you hit something. This will explode the sled, knocking up surrounding enemies and dealing damage. The driver is the first person to enter the sled, and the mechanics work like Sion’s ultimate.
- Guardian Angels: Your team gets a temporary Guardian Angel that lasts for 90 seconds.
- Statikk Shock: Your team gains a static shiv effect on auto-attacks.
- B.F Shields: Each winning team member gains a hefty shield until it’s broken.
- Mega Cloud Drake: Your team gains massive movement speed out of combat.
- Mega Ocean Drake: For 3 minutes, significantly gain health and mana regen when out of combat.
- Aspect of the Dragon: For 2 minutes, damaging an enemy champion below 20% instantly kills them.
FAQs
Question: Will League of Legends Release A New Map Soon?
Answer: It’s unlikely that League of Legends will release a new map soon as they are heavily focused on eSports and making Summoner’s Rift the best experience possible. However, we may see game modes released in the long-term future that will incorporate a new map design.
Question: Which Map Should I Play On League of Legends?
Answer: League of Legends features several unique maps that offer different gaming experiences. I recommend trying all the game modes and sticking with what you have the most fun with. Also, some maps are available for a limited time, so you should make the most of it while they’re still around.
• Summoner’s Rift: This is League of Legends’s most iconic map that features many game modes. The most popular is Ranked, where 10 players enter a 5v5 match to earn LP and increase their rating.
The Howling Abyss: The only game mode available on the Howling Abyss is ARAM. This is a single lane featuring an intense 5v5 battle. Due to the small map and constant fighting, most games last 15 to 30 minutes.
• Dominion: This map is a huge circle with 5 crystals that need to be captured. It works similar to Scaner’s passive, so there is no big learning curve for new and experienced players. However, this is not a permanent game mode, so you’d need to wait for RIOT to make the map available again.
• Nexus Blitz: This map features an immersive gaming experience that features multiple events. Winning these minigames results in buffs for your team that can help secure a victory. The map itself is perfectly designed with two lanes and a jungle. This makes gameplay more intense as both lanes require 2 champions.
Question: What Types Of Game Modes Does Summoner’s Rift Offer?
Answer: League of Legends offers multiple game modes for its huge following. Perhaps the most fun is URF because you can spam abilities like there’s no tomorrow. On the other hand, if you love competition, ranked is the top choice as all players try their best.
• Normal: This is a normal match on Summoner’s Rift. Players will not receive LP for winning, making it a great game mode to experiment on.
• Ranked: This is where competitive players can get their fix by entering a 5v5 battle for LP. Players are matched with similar rated people, so the games are fair in skill level.
• Flex: Unfortunately, ranked games only allow 2 players to queue, meaning you can’t play with a big group of friends. However, flex queue allows you and three other teammates to enter League’s competitive setting.
• URF: Ultra Rapid Fire is a game mode where all champions receive 80% cooldown reduction. This allows everyone to spam abilities, making games intense and fun. Unfortunately, URF only comes around once or twice per year.
• One for All: This funny game mode lets your team vote on a champion that everyone will play. Due to the joking nature of One for All, it’s occasionally released on April 1st.
League of Legends Locations & Map Guide: Summary
That concludes our League of Legends Locations and map guide. We’ve gone in-depth about the most famous map in MOBA history – Summoner’s Rift. It offers everything a player needs: multiple lanes, various jungle camps, utility plants, monster objectives, and more.
In addition, you can try out the other maps that League of Legends has to offer, like the Howling Abyss. It’s the perfect game if you have limited time as matches often end pre 20 minutes, and the action is intense. We hope you enjoyed reading this guide about our beloved game. If there’s anything else you’d like to learn, please don’t hesitate to write it in the comments below.

